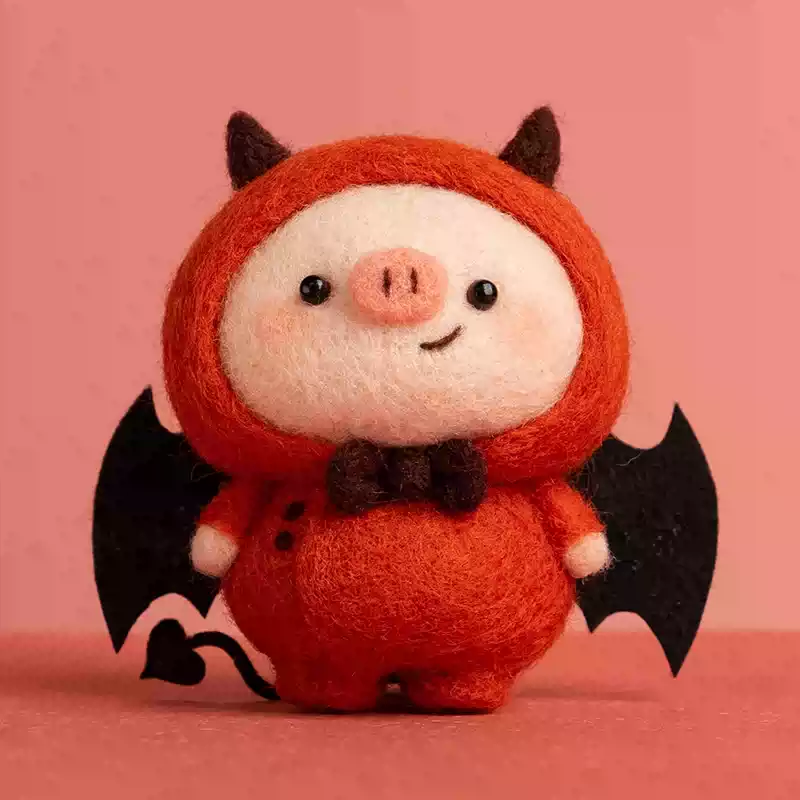
Devil Pig-Felt DIY Tutorial
This wool-felt doll is a cute pig wearing a little devil costume. The overall design includes:
- Round head and body
- Little devil hooded cape (orange)
- Pig nose, smiling mouth, and black eyes
- Small ears, arms, and legs
- Little devil wings and tail (black)
- Bow and button decorations on the chest
Detailed Steps
- Prepare Tools and Materials
Tools:
- Wool felting needles (coarse, medium, and fine)
- Sponge pad or foam pad
- Scissors
- Glue (for securing decorations)
Materials: - Wool fibers (colors: white (face), orange (clothes), pink (nose, ears), black (eyes, wings, tail, buttons))
- Glass eyes or black wool balls for eyes
- Black wool thread or embroidery thread (for the mouth)
- Black felt fabric (for wings and tail)
- Make the Head (White Wool)
- Take a small amount of white wool and roll it into a ball shape. Use the coarse needle to stab it repeatedly, adjusting the shape to make it firm and round.
- Use the medium needle to refine the surface, making it smoother and more even.
- Make the Body (Orange Wool)
- Take a larger amount of orange wool and roll it into a bigger ball, then stab it into an oval shape to form the body.
- Add more wool and use the coarse needle to adjust the shape, making the body rounder and fuller.
- Connect the Head and Body
- Add some loose wool to the bottom of the head and the top of the body.
- Align the head and body, and use the coarse needle to stab the connection area to secure them together.
- Use the medium needle to smooth the seam, making the transition natural.
- Make the Ears and Limbs (Orange and Pink Wool)
- Ears (Pink + Orange):
- Take a small amount of pink wool and stab it into a semi-circle shape.
- Cover the outside with a layer of orange wool to create the devil ear shape.
- Attach the ears to the sides of the head.
- Arms and Legs (Orange):
- Take a small amount of orange wool and stab it into two small cylinders for the arms.
- Take a larger amount of orange wool and stab it into two oval shapes for the legs, ensuring symmetry.
- Use the medium needle to attach them to the body, adjusting the angles and positions for a natural look.
- Create the Facial Features
- Eyes:
- Use black glass eyes or small black wool balls, and secure them in the appropriate positions.
- Nose (Pink Wool):
- Take a small amount of pink wool and stab it into an oval shape, poking two nostril holes and using the fine needle to carve out details.
- Attach it to the center of the head.
- Mouth (Black Wool Thread):
- Use black wool thread or embroidery thread to stitch a smiling mouth in the right position.
- Make the Little Devil Costume
- Hood (Orange Wool):
- Take a larger amount of orange wool and cover the outside of the head, stabbing it into the shape of a hood and wrapping it around the face contour.
- Wings and Tail (Black Felt Fabric):
- Cut out the wing shapes from black felt fabric and use glue to attach them to the back.
- Stab a long, thin strip of black wool into a tail shape, and cut a small triangle at the end (heart-shaped tail).
- Use glue to secure the tail at the lower back of the doll.
- Bow (Black Wool):
- Take a small amount of black wool and stab it into a bow shape, attaching it around the neck.
- Buttons (Black Wool):
- Take a small amount of black wool and stab it into two small buttons, attaching them to the front of the body.
- Final Adjustments and Refinements
- Trim Details:
- Use scissors to trim excess wool, making the overall look cleaner and neater.
- Strengthen Shape:
- Use the fine needle to stab the entire piece again, making it more firm and durable.
- Setting and Protection (Optional)
- Lightly mist with water and then dry with a hairdryer on low heat to help set the wool.
- Apply a small amount of clear glue to some connection points for added stability.
There you have it—a cute little devil pig wool-felt doll! You can customize the colors or add more decorations, such as little bells or different colored wings, according to your preferences.

